Authenticating API Requests
Almost all of ZapEHR's API endpoints require authentication. In order to invoke authenticated endpoints, you must include an access token in the Authorization header of your request. The Authorization header uses the bearer token format:
Authorization: Bearer <your_access_token>Getting an Access Token
ZapEHR uses the OAuth 2.0 standard (opens in a new tab) for authentication. How you get an access token depends on the type of Actor needing to make an API request. As the Actor guide explains, there are three types of Actors:
- Developers — Developers are the people who build applications that run on ZapEHR. They get an access token by completing the Authorization Code with PKCE flow, typically in the ZapEHR Developer Console (opens in a new tab).
- Users — Users are the people who log into Applications built on ZapEHR. They get an access token by completing the Authorization Code with PKCE flow with the Application they are logging into.
- M2M Clients — M2M Clients are used to invoke ZapEHR APIs from scripts and server-side code like Zambda Functions. They get an access token by completing the Client Credentials flow.
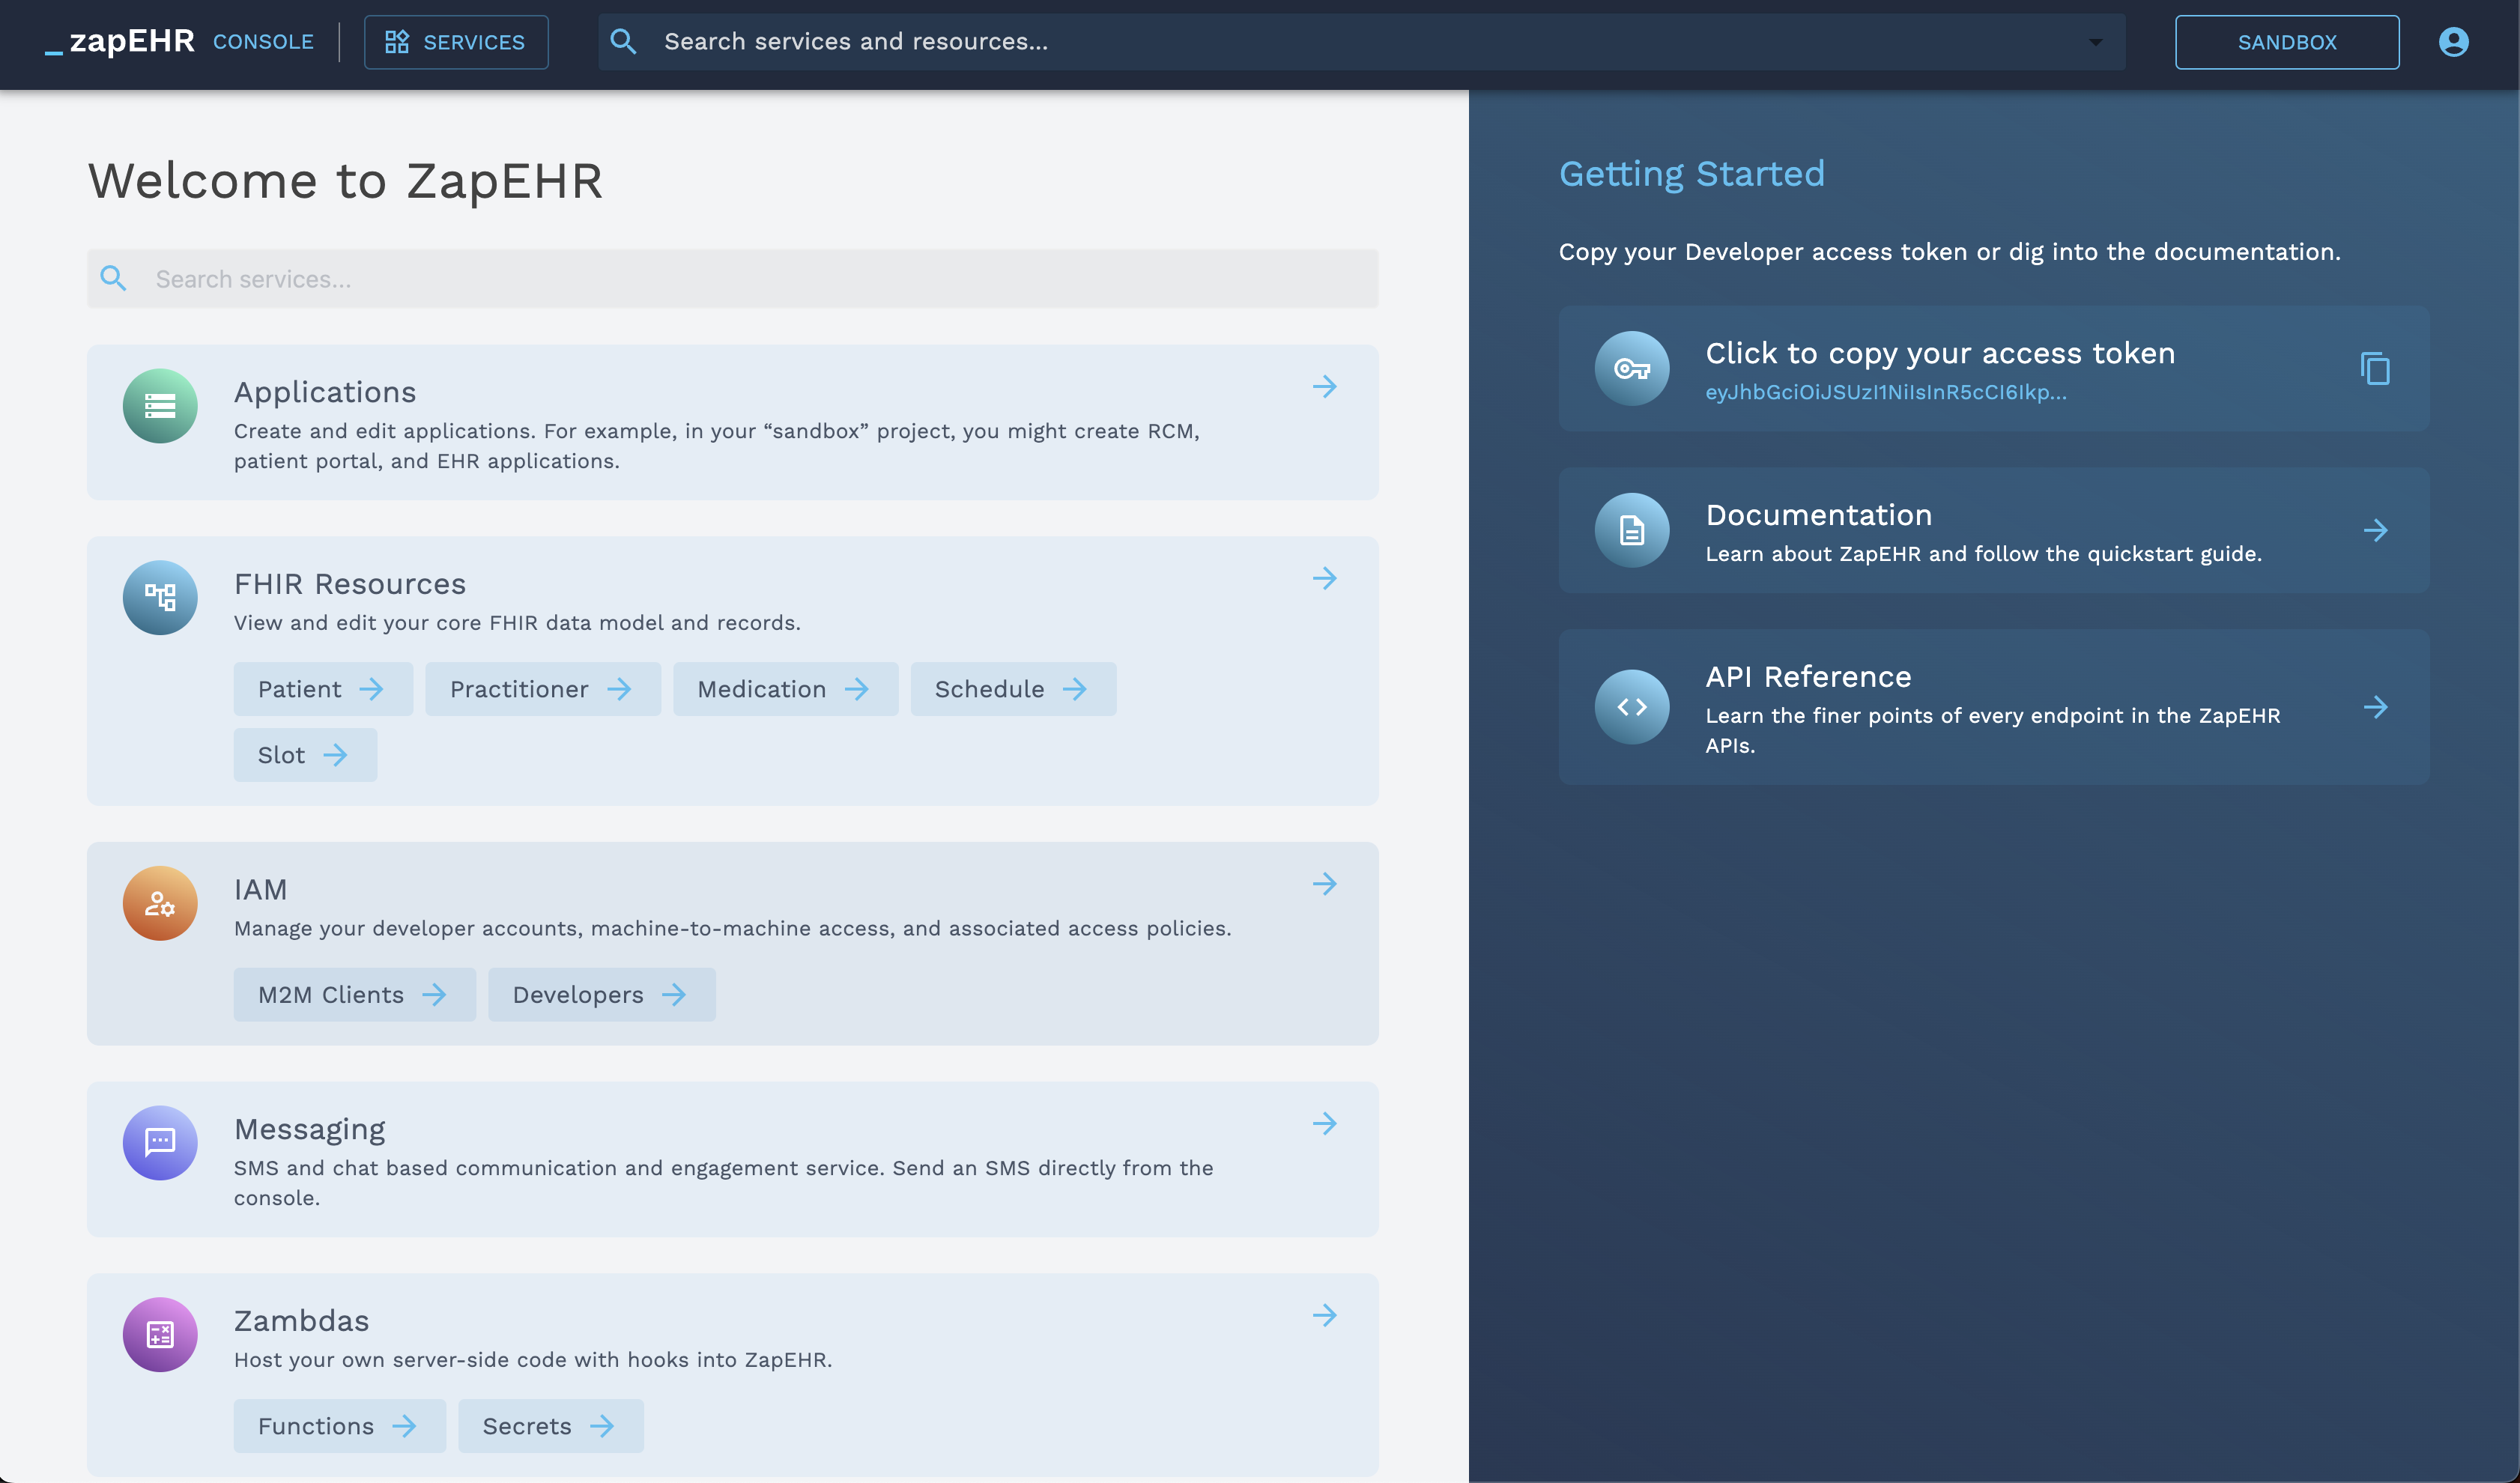
Getting an Access Token as a Developer
To get your Developer access token, log into the ZapEHR Developer Console (opens in a new tab) and click the button labeled, "Click to copy your access token", in the top right corner. (Click the image to zoom):
Getting an Access Token as a User
Users get an access token by logging into an Application in a web or mobile application. The Applications documentation provides detailed information on how the OAuth 2.0 Authorization Code with PKCE flow works, how you can secure your web or mobile app with ZapEHR, and how Users can log into those apps to get an access token.
User logging into an Application with Email + Password
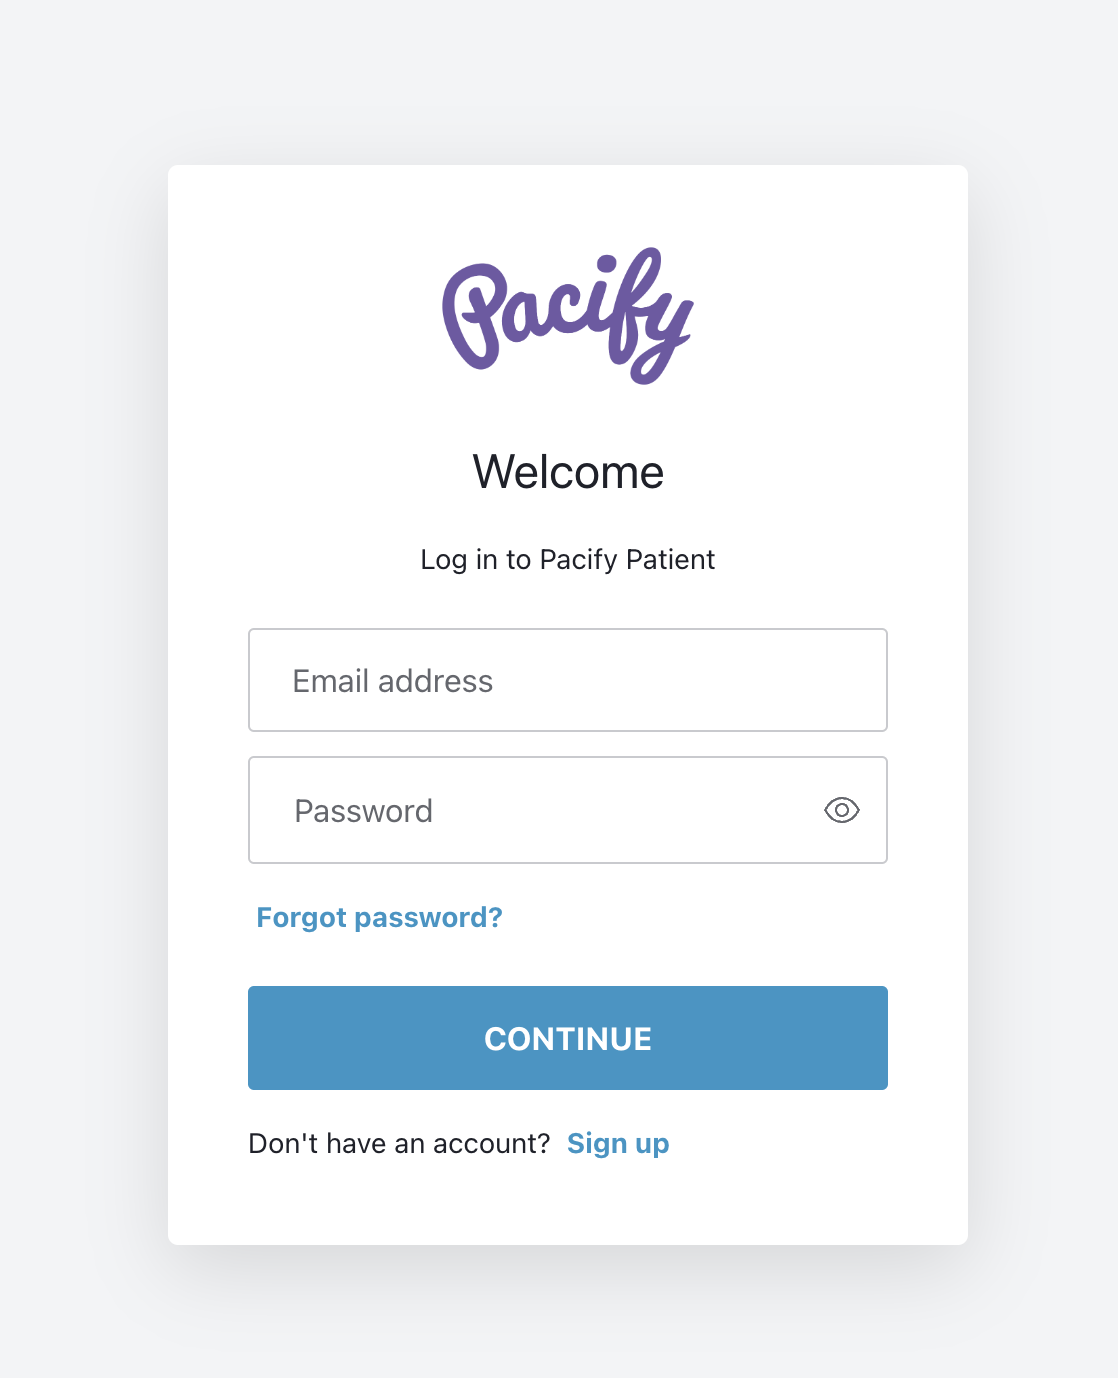
In place of the Pacify logo, you will configure your own logo for the Application.
When a User visits your web or mobile app that is secured with ZapEHR, you will initiate the login sequence by redirecting them to the ZapEHR login page. When they provide credentials and submit the form, they will be redirected back to your application with an authorization code. Your application then exchanges that authorization code for an access token by invoking the authorization server's /oauth/token endpoint.
There are javascript libraries you can use to automatically handle the redirects and exchange the authorization code for the access token. See the ZapEHR Hosted Login Page section of the Applications documentation for more information.
Getting an Access Token as an M2M Client
The M2M Client guide provides detailed information on how the OAuth 2.0 Client Credentials flow works and how to create and use M2M Clients.
To get an access token, send a POST request to https://auth.zapehr.com/oauth/token (opens in a new tab) with the M2M Client's Client ID and Client Secret in the request body.
const fetchResponse = await fetch('https://auth.zapehr.com/oauth/token', {
  method: 'POST',
  headers: {
    'content-type': 'application/json',
  },
  body: JSON.stringify({
    grant_type: 'client_credentials',
    client_id: '<your_m2m_client_id>',
    client_secret: '<your_m2m_client_secret>',
    audience: 'https://api.zapehr.com',
  }),
});

const jsonResponse = await fetchResponse.json();

if (fetchResponse.status === 200)
  console.log(`access token: ${jsonResponse.access_token}`);
else
  console.log(JSON.stringify(jsonResponse));
Using Access Tokens
The access token is a JSON Web Token (JWT) that contains information about the Actor. If you decode the access token (you can use an online tool like jwt.io (opens in a new tab), but be aware of the security risks (opens in a new tab)), you will get something like this:
{
  "https://api.zapehr.com/project_id": "36151859-6917-4140-b940-19d4a481ca27",
  "iss": "https://auth.zapehr.com/",
  "sub": "YOUR_CLIENT_ID_HERE@clients",
  "aud": "https://api.zapehr.com",
  "iat": 1679431859,
  "exp": 1679518259,
  "azp": "YOUR_AUTHORIZED_PARTY_HERE",
  "scope": "*/*",
  "gty": "client-credentials"
}
Note the https://api.zapehr.com/project_id claim — This claim holds your project ID, and it tells the server which project the access token is for.
Depending on the Actor type, the access token may or may not include this important claim:
- Users and M2M Clients exist inside of (and can act on) a single Project, so their access tokens include the
https://api.zapehr.com/project_idclaim. - Developers exist above the Project level and may act on multiple Projects, so their access tokens do not include
https://api.zapehr.com/project_idclaim. Instead, when Developers call the FHIR API and Project APIs, they include thex-zapehr-project-idheader to specify the Project they are acting on.
| Actor Type | JWT Includes project_id claim | Must send x-zapehr-project-id header |
|---|---|---|
| Developer | ✅ | |
| User | ✅ | |
| M2M Client | ✅ |
x-zapehr-project-id Header
Developers can act on multiple Projects, and even make new Projects. Because of this, when making API requests to the FHIR API and Project APIs, you must set the x-zapehr-project-id header with the ID of the Project you want to act on.
For an example of this, load Practitioners in the Developer Console (opens in a new tab) and inspect the network requests. Note that the Console includes the x-zapehr-project-id header in the network request to https://fhir-api.zapehr.com/r4/Practitioner.
When the x-zapehr-project-id header isn't included, requests will get an "Unauthorized" error with a status code of 401 unauthorized.
const response = await fetch(`https://fhir-api.zapehr.com/r4/Practitioner`, {
  headers: {
    Authorization: `Bearer ${your_access_token}`,
    'x-zapehr-project-id': your_project_id,
  },
  method: 'GET',
});
Token Expiration
Access tokens expire after 24 hours. When you make requests with an expired token, you will get a 401 Unauthorized error. You can check for when the token is close to expiration by decoding the JWT and looking at the exp claim:
{
  ...
  "exp": 1702475647,
  ...
}
The exp claim holds the time when the JWT will expire in Unix epoch time (opens in a new tab). The example 1702475647 value is equivalent to "Wednesday, December 13, 2023 1:54:07 PM" in UTC time.
Compare the exp time with the current time, and if the token is close to expiration, you can get a new access token using the appropriate method for the actor type (Getting an access token).